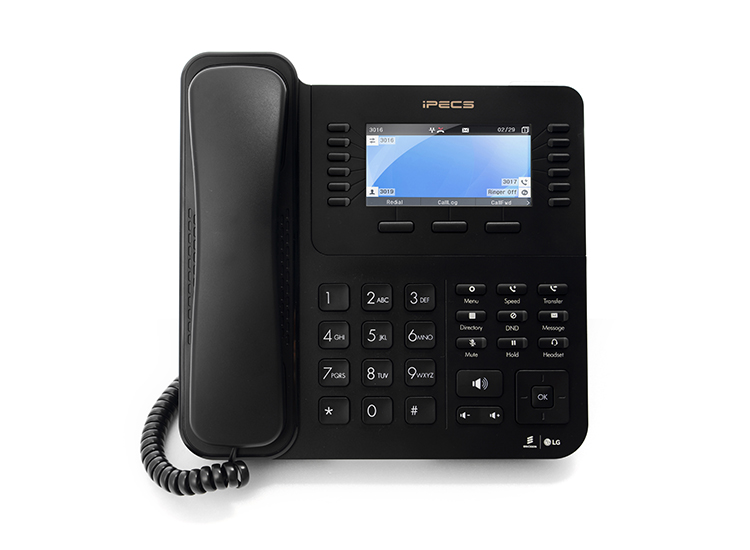
**This user page has general guidelines and will work for most of the Summit systems that Pyramid installs. Your system may be programmed differently for some of the features listed.
--Making a Call Press a Line or Loop button and dial. This can be done with handset down in the speakerphone mode, or by lifting the handset. If you are talking on the handset, and want to switch to the speakerphone, press the SPEAKER button and hang up.
--Answering a Call If your phone is programmed to ring either lift handset or press the speaker button. To answer a call ringing at a different station, press the soft-key under the word ‘pickup’ in the display, and lift up the handset. The button must be picked up before the handset is lifted.
--Calling Another Telephone With the handset in the cradle or lifted, press the button associated with that telephone, or dial the 3 (or 4) digit number.
--Placing a Call on Hold Simply press the hold button, the line button will then flash and be available to be answered by any other station. If your system does not have direct line buttons press an available Park Button, the Caller will then be on hold and the associated Park button will flash, allowing any other system phone to answer.
--Transferring a Call Press the transfer button then either press the associated DSS button or dial the intended recipients 3 (or 4) digit station number, announce the call as needed. NOTE: Pressing the hold button twice will place the call on ‘exclusive hold’, and only the telephone that puts the call on hold will be able to take it off of hold.
--Conference Calls A maximum of 15 parties can be conference together. These can be incoming or outgoing calls. While talking with the 1st party, press the button under the LCD display labeled CONF. This will put that party on hold. Establish the second call. Press the CONF button twice. If you wish to add a 3rd party, press the CONF button once to put the first two callers on hold. Establish the third call. Press the CONF button twice to establish the conference. This process is repeated until all parties are together. It is not uncommon for people being on the conference call to experience lower than normal volume.
--Do Not Disturb Press the button labeled DND/FWD. The red light next to the button will flash. All callers to your extension will now go directly to your voice mail box.
--To Change Ringing Tone Press the TRANS/PGM key and 1 on the keypad. Press 2 on the keypad. Your phone will ring in its current tone. Dial a two digit number from 01 to 15 to select the tone of ring you want, and press the HOLD/SAVE button to save your selection.
--Programming Station Speed Dial Numbers Press TRANS/PGM and SPEED. A two or three digit number will come up in your display. This is the next available speed dial bin. Dial the bin number you want on the keypad. Dial the telephone number. Press the HOLD/SAVE button to store the number.
--Dialing Speed Dial Numbers Press SPEED Button and dial the 2, 3 or, 4 digit speed dial number. The system will automatically select a line and dial the number.
--Program a Speed Dial Button To program a speed dial number on a blank button, press the TRANS/PGM key then the button to be programmed. Then press the SPEED key, and dial the speed dial number. Press the HOLD/SAVE key to save your selection. (Putting a speed dial number on a button is a two step process. You must first program the speed dial number into a bin location, and then put the bin location on the button.)
--Transferring a Caller Off-Site With a caller on the line, press the TRANS/PGM key then press an available Line or Loop Button, dial the phone number as needed. The outbound caller ID is from your phone so it is a good idea to wait until the call is answered and announce the call. After announcing the call hang up to complete the transfer. If A Speed Dial Button is available, simply Press the Transfer button then the associated Speed Dial Button.
VOICE MAIL
--Record Your Name DIAL 563, PRESS 1 folow prompt
--Record Your Greeting after logging into your mailbox press 8, then press 1
--Changing Your Mailbox Password -- after logging into your mailbox press 8, then press 2
--Transfer a Caller to Some-ones Voice Mail Box With the caller on the line, press the TRANS/PGM key, the CALL BACK (or MESSAGE) key, the appropriate persons button, (or dial their extension number), and hang up. Do not put the caller on hold. If you do, simply go back to the line and start over.
--Leaving a Voice Mail For Another Telephone in the Office Press the persons intercom button, or dial their extension, then press the CALL BACK (or MESSAGE) key.
--Forwarding Messages to Other Mailboxes When listening to a message, press 4, follow prompts.
--Retrieving Voice Mail Messages When you have voice messages, the light above the display will flash. Press the CALL BACK (or MESSAGE)key. Enter your password and follow the instructions.
--Retrieving Messages From Off Site Call the main telephone number. If the Auto-Attendant answers, press ‘#’ on your keypad. Enter your mailbox number and password, follow the instructions. If someone answers the phone, have them transfer you into your voice mail box. When you hear your greeting, press the # key, enter you mailbox number and password and follow the instructions.
--Recording Conversations When on a call, use the navigation button and go to the right. In your display, the word RECORD will appear above the left most key or if programmed you may have a “RECORD” button. Press that key and your conversation will be recorded into your mail box as a new message.
Changing your mailbox password:
Log into your voicemail box, dial 8 then 2
Follow voice instructions (dial new password followed by # key, and repeat)
Dial 563 then 1 and speak your name
Record your greeting:
Press the CALLBACK (or MESSAGE) button
When prompted, enter your password
Dial 8 on the dial pad
Dial 1 on the dial pad
Dial 7 on the dial pad
Record your greeting and dial # when finished
ADMINISTRATIVE FUNCTIONS
**These functions must be done from the main administrative phone. In most systems this will be ext. 100.
--System Speed Dial Numbers Press the TRANS/PGM and SPEED. Dial the bin number you want on the keypad. Dial 9 and then the telephone number. Press the HOLD/SAVE button to store the number.
--Recording System Greetings
From on site--Press TRANS/PGM, and dial 0 - 6 on the keypad. Enter the greeting number. In most cases the day greeting will be 001, and the night greeting will be 002. Press 1 for REC type. Follow the verbal instructions. Press HOLD/SAVE when finished to save the greeting.
--Switching Between Greetings Most systems are set up to switch automatically between the day and night greetings. In this case, the DND/FWD light will flash on the administrative phone. Should you wish to switch to a ‘manual’ mode, press DND/FWD, select the desired ring mode 1-5. Press HOLD/SAVE to save the change.
--Changing system Time and Date
PRESS [TRANS/PGM], 0 “attendant functions”
PRESS 4 “time / conf. room”
PRESS 1 “change date / time”
DIAL MM:DD:YY ie. March 10th 2014 = 031014
PRESS HOLD/SAVE
DIAL HH:MM (military time) ie. 8:30 am = 0830; 8:30 pm = 2030
PRESS HOLD/SAVE


